 Save
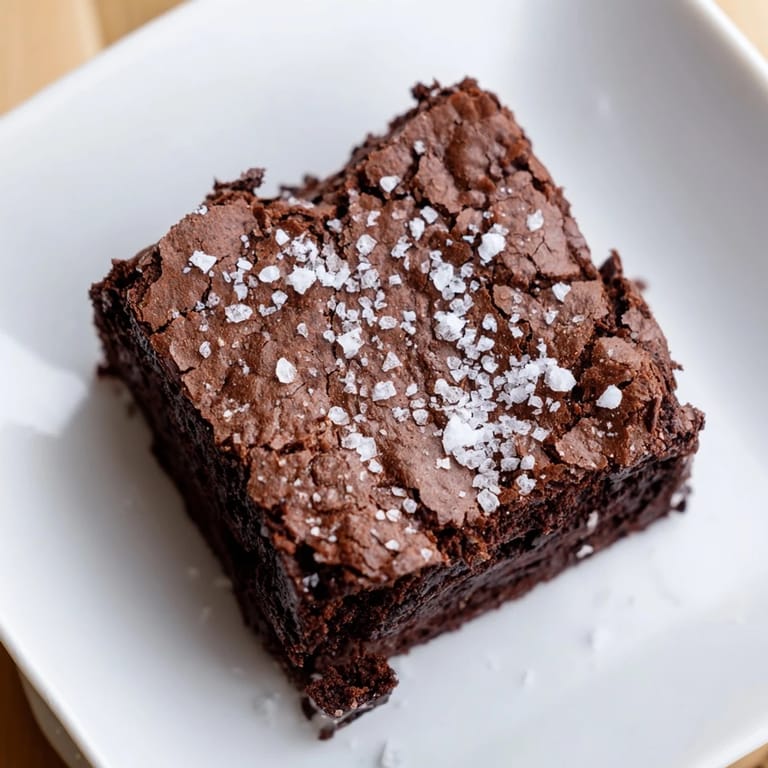
Save I baked these brownies on a rainy Tuesday when I had nothing planned and a bar of good chocolate sitting in the cupboard. The kitchen filled with that deep, bittersweet smell while they baked, and I stood by the oven longer than I needed to, just watching the edges set. When I pulled them out and sprinkled the salt on top, I knew I'd made something worth keeping. They cooled on the counter while I made tea, and I ate one warm, straight from the pan, standing at the stove. That first bite, fudgy and rich with just a hint of salt, felt like a small victory.
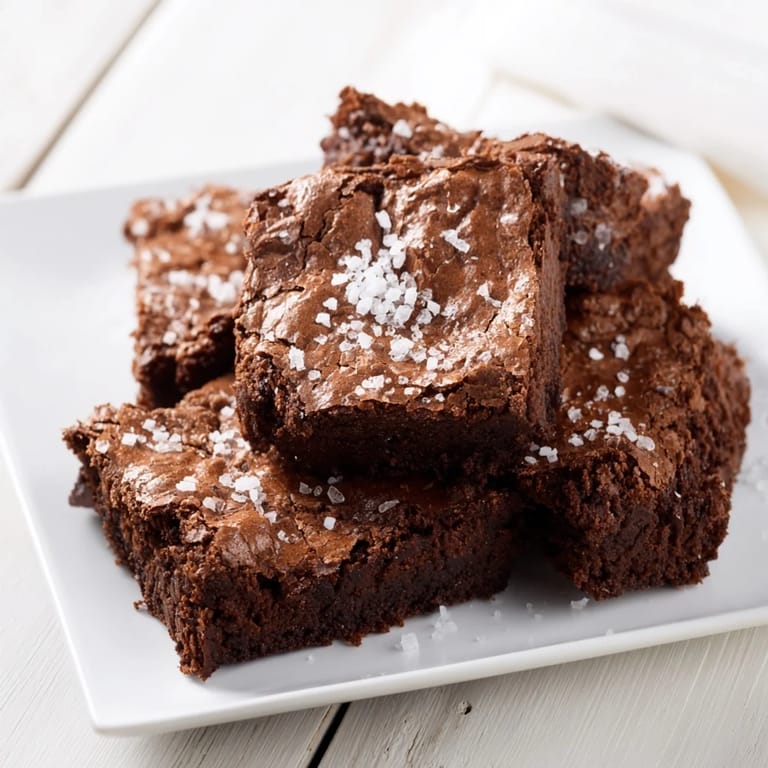
I made a batch for a friend's birthday once, cutting them into neat squares and dusting the tops with extra salt. She called me later that night to ask for the recipe, saying they were the best brownies she'd ever had. I don't know if that was true, but it felt good to hear. Since then, I've made them for quiet evenings at home, for potlucks, for moments when I just need something comforting to do with my hands.
Ingredients
- High-quality dark chocolate (70% cocoa): This is the backbone of the recipe, so use the best you can find—cheap chocolate will taste waxy and flat.
- Unsalted butter: It melts into the chocolate to create that glossy, rich base, and using unsalted lets you control the salt level perfectly.
- Granulated sugar and light brown sugar: The combination gives you sweetness and a hint of molasses depth that balances the bitterness of the chocolate.
- Eggs (room temperature): Cold eggs won't emulsify as well, so let them sit out for 20 minutes before you start.
- Pure vanilla extract: A little goes a long way in rounding out the chocolate flavor without competing with it.
- All-purpose flour: Just enough to give structure without making the brownies cakey.
- Unsweetened cocoa powder: Adds an extra layer of chocolate intensity and a slight bitterness that keeps things interesting.
- Fine sea salt: Mixed into the batter, it enhances every other flavor quietly.
- Flaky sea salt: The finishing touch—crunchy, bright, and essential for that sweet-savory contrast.
Tired of Takeout? 🥡
Get 10 meals you can make faster than delivery arrives. Seriously.
One email. No spam. Unsubscribe anytime.
Instructions
- Prep your pan:
- Line the baking pan with parchment, letting it hang over the sides like little handles. This makes lifting the brownies out later so much easier, and you won't have to pry them from the corners.
- Melt the chocolate and butter:
- Set a heatproof bowl over simmering water and stir gently until everything melts into a smooth, glossy pool. Let it cool for a few minutes so it doesn't scramble the eggs later.
- Whisk the sugar and eggs:
- Beat them together until the mixture turns pale and thick, almost like ribbons when you lift the whisk. This takes a couple of minutes, but it's what gives the brownies their shiny top.
- Combine chocolate and eggs:
- Pour the melted chocolate into the egg mixture and whisk until it's all one color, dark and glossy.
- Fold in the dry ingredients:
- Sift the flour, cocoa, and salt over the batter, then fold gently with a spatula until just combined. Overmixing will make them tough, so stop as soon as you don't see streaks of flour.
- Pour and top with salt:
- Spread the batter into the pan and smooth the top, then sprinkle the flaky salt evenly across the surface. Don't skip this—it's the whole point.
- Bake until just set:
- They're done when a toothpick comes out with a few moist crumbs clinging to it, not clean. The center should still look a little soft—it will firm up as it cools.
- Cool completely:
- Let them rest in the pan on a wire rack until they're cool to the touch. Cutting them warm will give you a melty mess instead of clean squares.
 Save
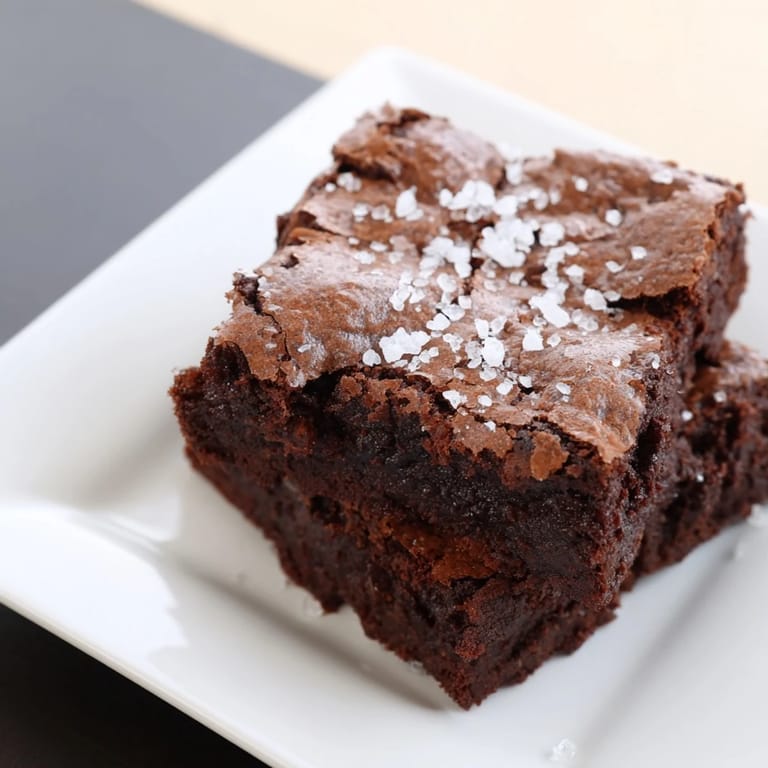
Save One night I served these brownies with vanilla ice cream after dinner, and the table went quiet except for the sound of spoons scraping plates. My partner looked up and said, these are dangerous, and I knew exactly what he meant. They disappeared faster than I expected, and I found myself wishing I'd hidden a few for myself.
How to Know When They're Done
The tops will look set and maybe even crackle a little, but the center should still jiggle slightly when you shake the pan. A toothpick test is your friend here—insert it about an inch from the center, and if it comes out with a few sticky crumbs, you're golden. If it comes out clean, they've gone too far. I learned this the hard way after baking a batch into submission once, and they turned out more like cake than brownies.
Storing and Serving
These brownies keep well in an airtight container at room temperature for up to four days, though they rarely last that long. I like to cut them into squares and stack them between layers of parchment paper. If you want to serve them warm, a few seconds in the microwave brings back that just-baked softness. They're also incredible straight from the fridge the next morning with coffee, when the texture turns dense and fudgy.
Variations and Add-Ins
I've folded in dark chocolate chips before baking, which creates little pockets of melted chocolate throughout. Walnuts add a nice crunch if you're into that, though I prefer them plain so the chocolate can speak for itself. Once I swirled in a spoonful of tahini before baking, and the nutty bitterness was a beautiful surprise.
- Try adding a pinch of espresso powder to the dry ingredients for deeper chocolate flavor.
- Swap half the flour for almond meal for a denser, more European-style brownie.
- For a gluten-free version, use a 1:1 gluten-free flour blend and you won't notice the difference.
 Save
Save These brownies have become my go-to when I want to bake something that feels special without a lot of fuss. They're rich, a little bit fancy with the sea salt, and they always deliver.
Recipe FAQs
- → What type of chocolate is best for these brownies?
Use high-quality dark chocolate with around 70% cocoa for a rich, intense flavor and fudgy texture.
- → Can I add nuts or chocolate chips to the batter?
Yes, folding in dark chocolate chips or chopped walnuts before baking adds extra texture and richness.
- → How does the sea salt enhance the brownies?
Flaky sea salt sprinkled on top balances the sweetness, enhancing the chocolate’s depth and adding a subtle savory contrast.
- → What baking pan size should I use?
A 20 cm (8-inch) square baking pan lined with parchment paper ensures even baking and easy removal.
- → Can I make these brownies gluten-free?
Replacing all-purpose flour with a gluten-free blend works well without compromising texture.